
Usage
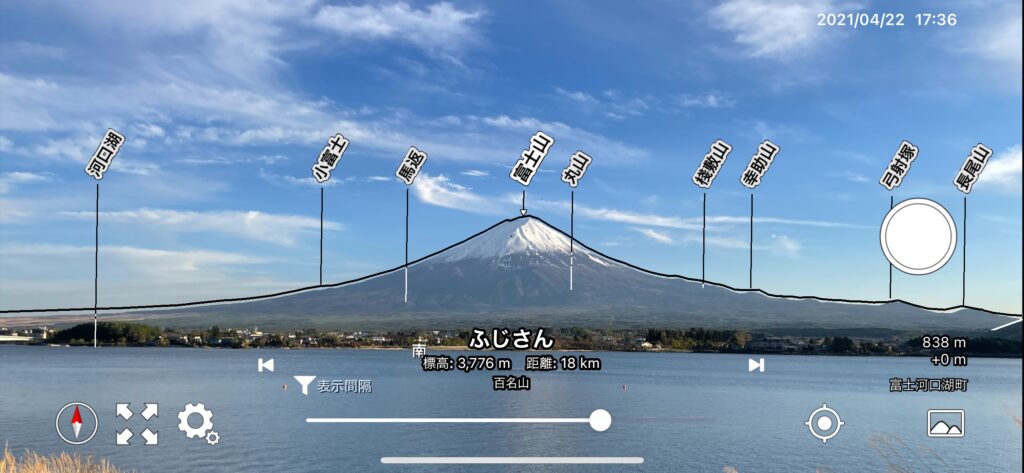
Launch the app and point it towards the peak to display the peak’s name in AR. Holding the phone upright activates AR mode, while pointing it downward switches to Terrain mode. In AR mode, aligning the guidelines with the peak on the screen allows you to confirm the peak’s name.
AR Mode
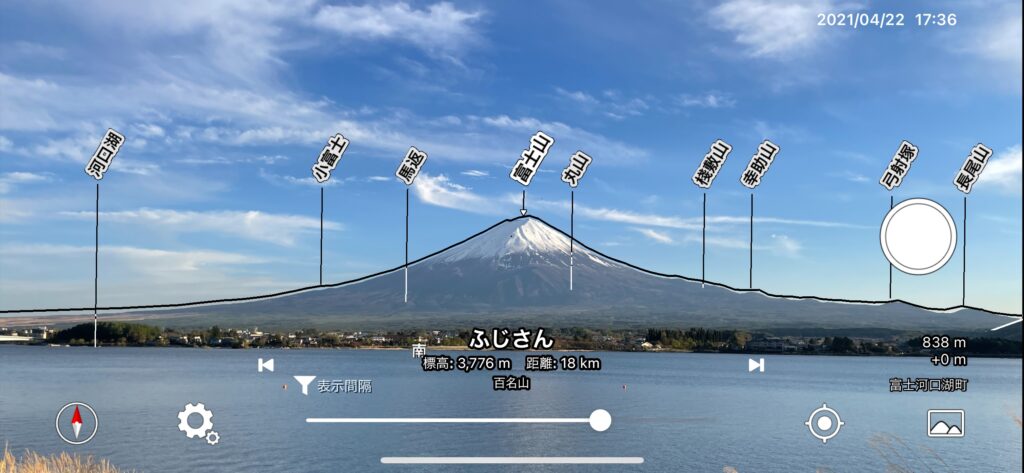
This mode is activated by holding the device upright. In the camera preview, AR overlays the peak’s name label and ridge guidelines. You can adjust the position of peaks or guidelines via swiping.
Terrain Mode
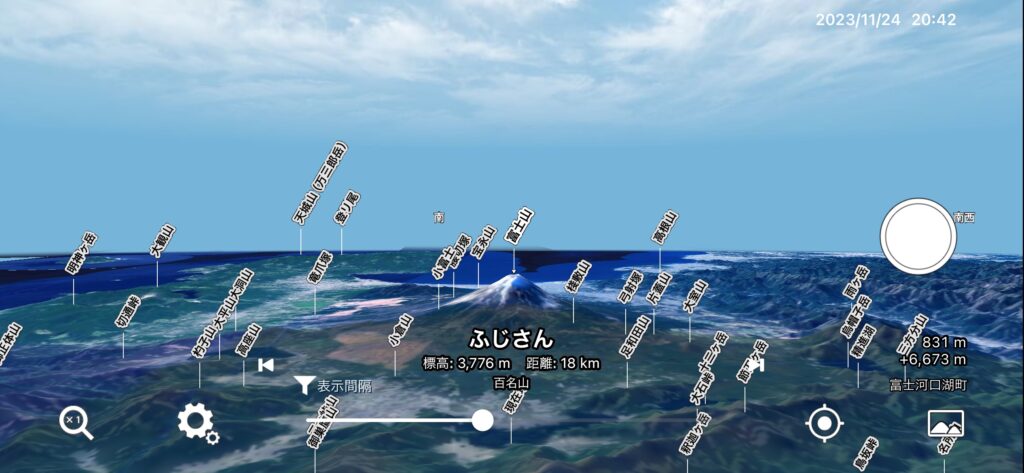
This mode is activated by pointing the device downward. 3D terrain created from data obtained by artificial satellites is displayed, providing a top-down view of the current location. You can adjust the angle and height with a swipe.
Edit Mode (Stable Mode)
Holding down the shutter button freezes the camera preview and switches to edit mode. Even if you load an image from the album, it still switches to edit mode. The gyroscope sensor stops, and the zoom in/out (![]()
![]() ) button appears, which can be toggled on or off. This mode is useful not only for saving photos with the peak’s name but also for verifying the peak’s name or altitude.
) button appears, which can be toggled on or off. This mode is useful not only for saving photos with the peak’s name but also for verifying the peak’s name or altitude.
Basic Operations
Tap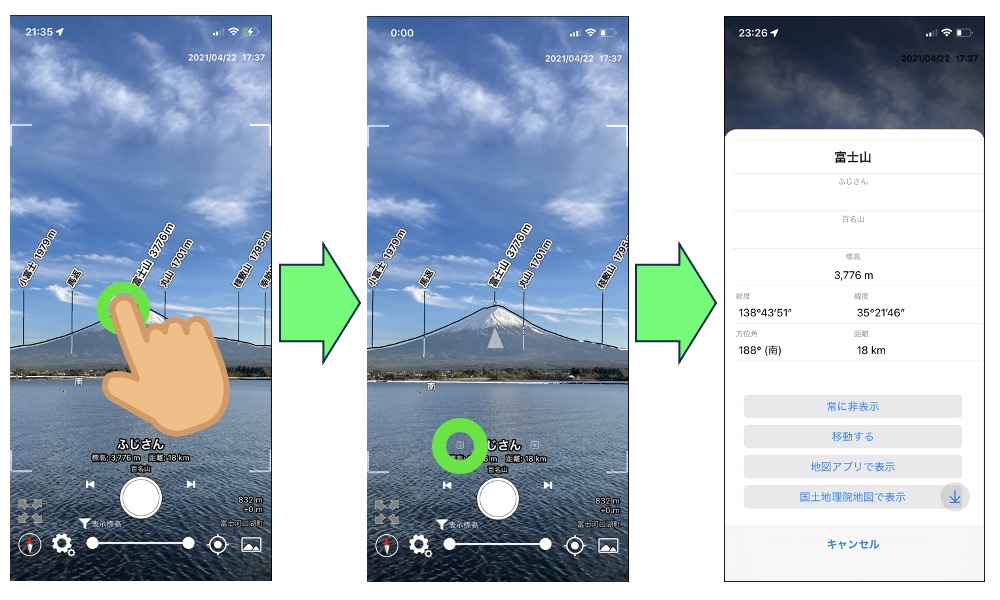
Tapping the peak’s name label (or the name at the bottom center of the screen) selects that peak. Tapping the selected peak again or the ![]() icon displays details about that peak.
icon displays details about that peak.
Swipe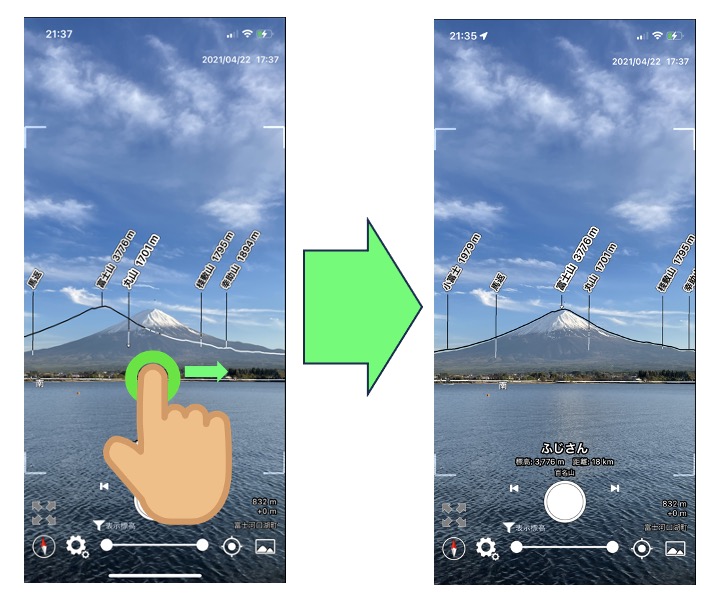
You can move the peak label and ridge guideline up, down, left, and right. If the AR display, such as the peak label, is misaligned with the actual mountain, use swipe gestures to move and align it.
Pinch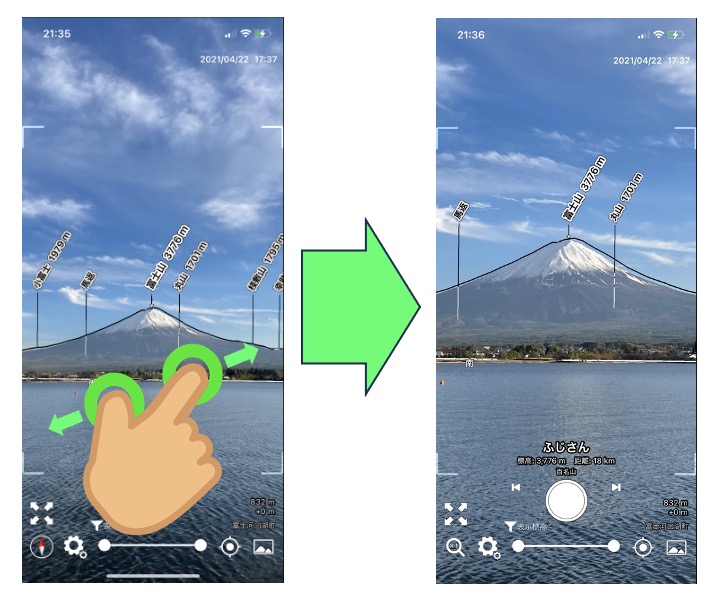
You can zoom in or out on the image. Useful for checking distant peaks or adjusting the photo’s range.
Rotate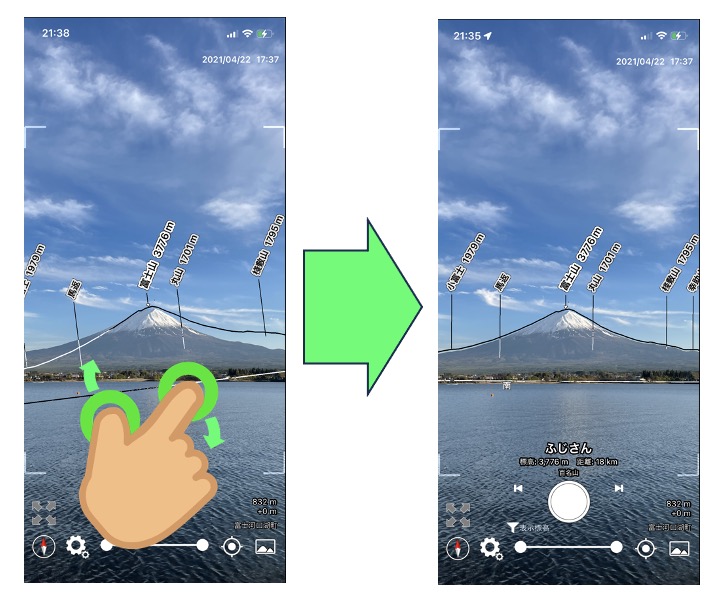
You can rotate the peak’s name label or ridge guidelines. Useful if the loaded photo is tilted.
Screen Names and Functions
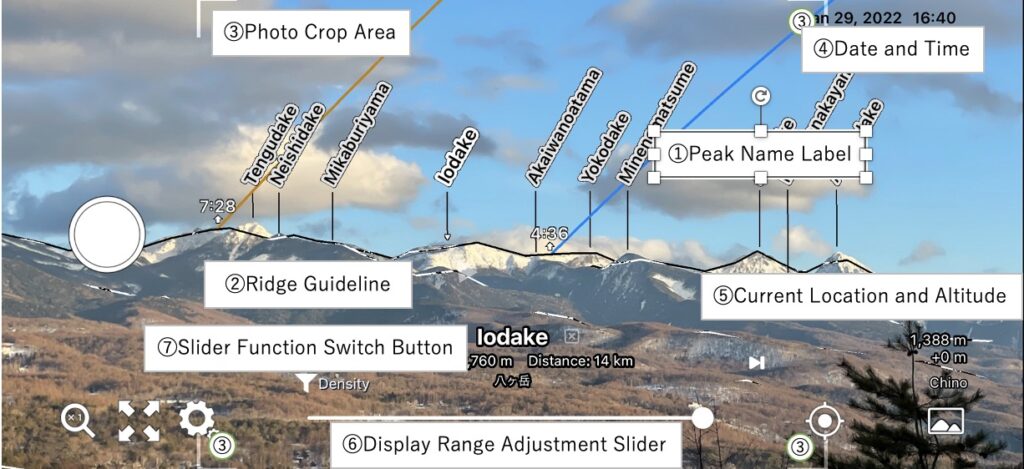
1. Peak Name Label
Displays the peak’s name. Tapping the peak’s name label (or the name at the bottom center of the screen) selects it. In the selected state, tapping the peak’s name label again or the ℹ️ (i) icon displays details about that peak.
2. Ridge Guideline
Shows the guideline along the peak’s ridge. By swiping, you can align the guide with the actual ridge shown in the camera preview. Tap an empty area, such as the sky, to toggle the display of the ridge guideline on/off.
3. Photo Crop Area
When saving a photo synthesized with the peak’s name label using the capture button, these are the boundaries of the saved area.
4. Date and Time
Tapping on the date opens a date change dialog, and tapping on the time opens a time change dialog. By changing the date, you can check the position and time of sunrise, sunset, moonrise, and moonset for that specific date. Changing the time allows you to check the position of the sun or moon at that specific time. Useful for planning photos at specific times and locations.
5. Current Location and Altitude
Displays the altitude and name of the current location. Tapping the altitude allows you to adjust it (viewpoint).
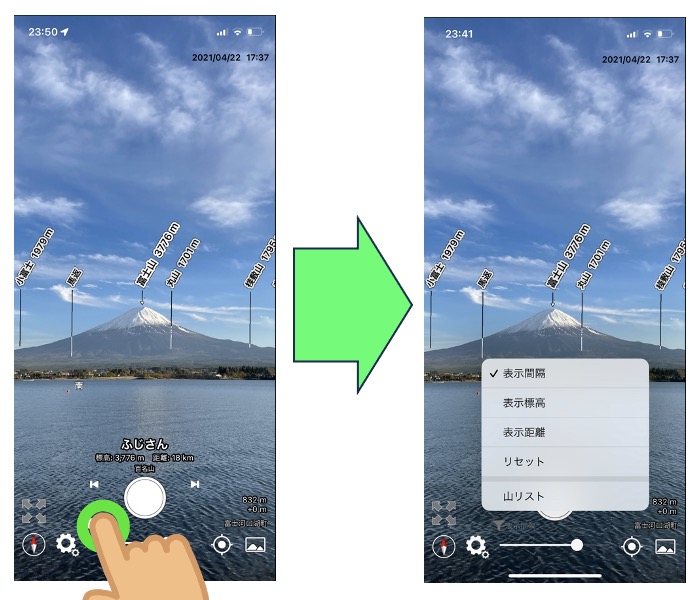
6. Display Range Adjustment Slider
You can adjust the display interval, distance range, elevation range, etc., of the peak label. Tap the slider function switch displayed at the top left of the slider to switch and adjust the content.
7. Slider Function Switch Button
Switches the functionality of the display range adjustment slider.
- Density
Slider to specify the display intervals for peak labels. (Default) - Elevation
Slider to specify the elevation range of displayed peaks. - Distance
Slider to specify the distance range of displayed peaks. - Reset
Resets the above three settings. - Peak List
Displays a list of peaks within the specified range.
— The following is only displayed in AR mode —
- AR Field of View
Adjusts the field of view for AR display. (Usually set to 0) - Latency of AR
Slider to adjust synchronization between AR display and camera preview. Configures synchronization when swinging the smartphone left or right. - Compass Correction
Swipe left or right in AR display to align with a direction, then press the set button to make it the default. - Leveling of AR
If the AR display is tilted, you can correct it by placing the device vertically on a flat surface and pressing the set button.※Not saved
Button Descriptions
 Shutter Button
Takes a photo. In AR mode, it saves two photos: one before adding the peak’s name and one after adding the name. The photo before adding the name can be opened from the album button to make further adjustments to the peak’s name or to re-add the name. Holding down the shutter button directly opens the just-taken photo.
![]() Direction Reset Button
Direction Reset Button
Displayed after adjusting the direction with a swipe. Tap to reset the direction.
![]() Scale Reset Button
Scale Reset Button
Displayed after the zoom in/out operation (pinch). Tap to reset the initial zoom.
![]() Return Button
Return Button
Displayed when reaching the peak of a mountain. Tap to return to the starting point.
![]() Close Button
Close Button
Displayed when opening a photo. Tap to close the photo.
![]() Settings Button
Settings Button
Allows various settings.
![]()
![]() Map Button
Map Button
Allows adjustment of the current location. The center turns blue when using GPS location information.
![]() Album Button
Album Button
Loads images taken by the shutter button or other apps. Loading images with a 1:2 aspect ratio is used as a background for 360-degree images.
![]()
![]() Zoom In/Out Mode ON/OFF Button
Zoom In/Out Mode ON/OFF Button
Displayed when loading a photo. In ON state (white), you can zoom in and out of photos with the pinch operation, adjust the position of photos with the swipe operation, and rotate the photos with the rotate operation. In OFF state (gray), you can adjust the photo’s angle with the pinch operation, adjust the position of the photo with the swipe operation, and rotate the photo with the rotate operation.
Exiting the Application
The method to exit the application may vary depending on your device, but for most devices, you can follow these general steps:
Swipe from the bottom towards the center of the screen (keep your finger on the screen while moving it), and then release your finger to display the currently running apps.
Among the displayed apps, swipe upward on the app you want to close, as if you’re swiping it away from the screen.
Please note that on some devices, instead of displaying running apps, the navigation bar might appear. If this is the case, tap the app history button (the name may differ depending on the device) in the navigation bar to view running apps.
For Android devices, there might also be an “Exit” option at the bottom of the settings menu for closing the application.